|
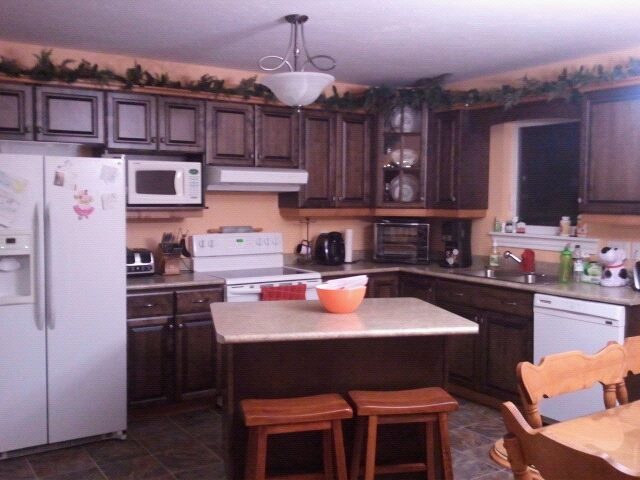
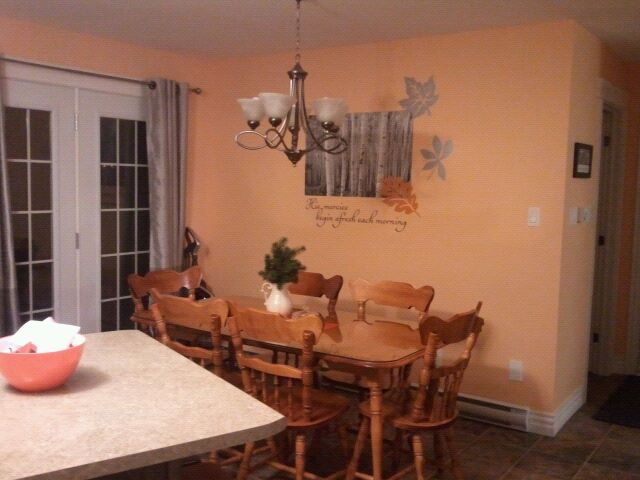
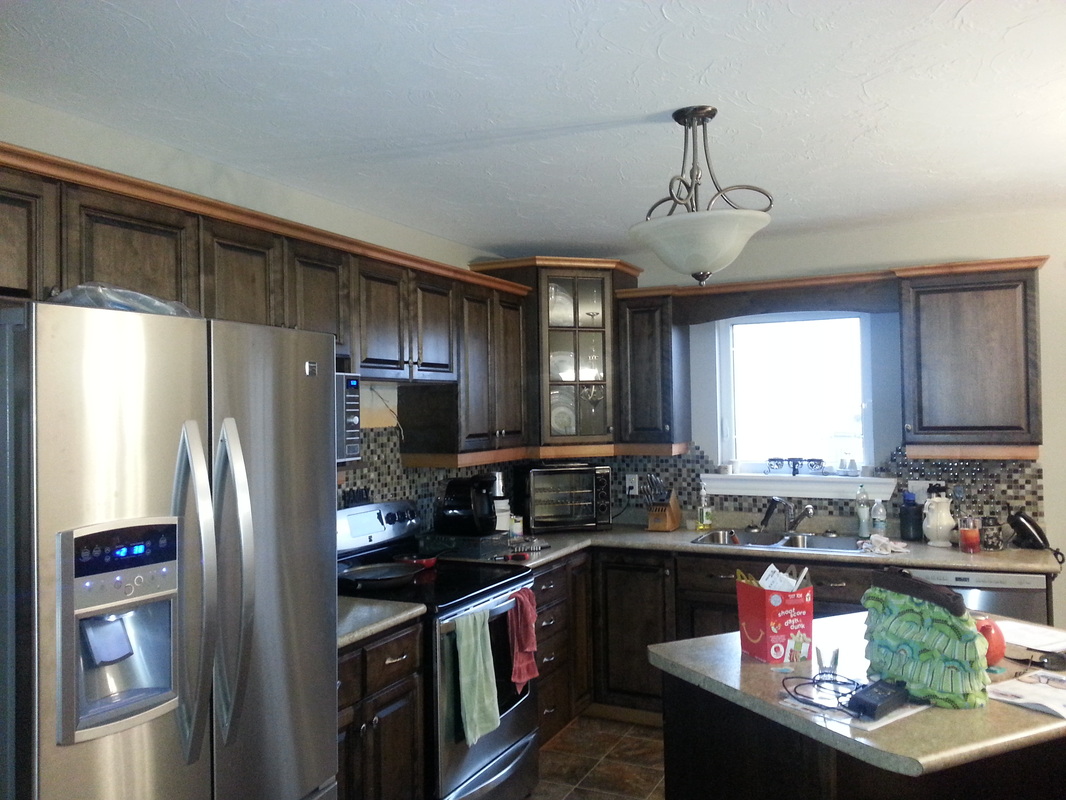
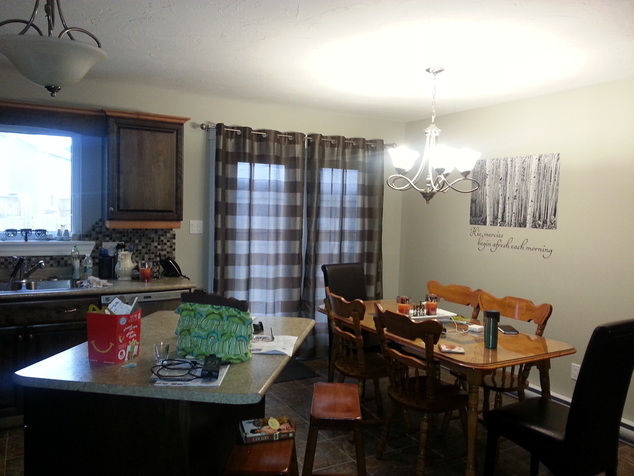
Sometimes a forced change is a good thing! My fridge went on the blink. I called a few appliance repair places and each of them wanted money just to come look at it and their over-the-phone estimates told me it was going to cost a lot just to try to figure out what was wrong. Its old and I didn't want to chance putting money into it for nothing or end up paying nearly as much as a new one in the end. So, off my husband & I went all over the city of Moncton to find a new fridge. Although we wanted to have all new stainless steel appliances, we didn't want to go that expense where everything else was working just fine so we searched for a white fridge. No where could we find a white fridge that fit the opening to take home right away. We found only 3 options: a white fridge the same price as a stainless steel one but we could get it in 3 days (meanwhile our produce would spoil), a white fridge $100 less than a stainless steel one that we could get in 3 weeks, or get a stainless steel fridge right away (that just happened to be on a great sale). Well, not wanting my reputation as a decorator to be tarnished when people came to visit and seen one stainless steel appliance in a beautiful new home with the rest of the appliances being white, we got a package deal on all new stainless steel appliances! Yippee!! What a difference it made to the whole look of the kitchen! Now it was time to paint. I first took home a sample pot of Benjamin Moore's Coventry Grey and discovered that the oak colour brought out the blue pigments way too much and made the grey look blue. Then, I decided to try everyone's favourite, Benjamin Moore's Revere Pewter! That one was the winner! I tried to remove my custom stickers off the dining room wall before painting but due to the existing cheap paint, it was going to tear off the drywall with it. So, I taped off the picture and painted over the letters. Once the paint dried well, I scraped every one of those letters off with my fingernails! Looks great! Before . . . . . . after! Ignore the clutter in the pictures. I was too anxious to take a picture to actually finish the clean up process. LOL. What a difference, eh!
My ultimate goal is to put beadboard wainscotting about 3' up the walls and paint that a dark brown to match the cupboards. I plan to leave the trim all white, including the chair rail that will finish off the wainscotting. I also plan to put a transparent dark brown window film on the underside of the table glass, to bring in that extra element of brown to the table. (By the way, don't you love those faux leather chairs I switched out at the head & foot of the table! I got those for a crazy deal at Kent Building Supplies and stored the wooden ones away.)
0 Comments
Leave a Reply. |
Follow me!
Categories
All
Archives
April 2020
|

 RSS Feed


